Two-in-one soldering and rework stations have become the go-to solution for electronics technicians, hobbyists, and repair professionals who need a compact, efficient, and cost-effective setup. Combining a soldering iron and a hot air rework tool in one device, these stations simplify your workspace while expanding your capabilities.
In this guide, we’ll show you how to use a two-in-one station like a pro—whether you’re repairing mobile phones, working on PCBs, or reflowing SMD components.
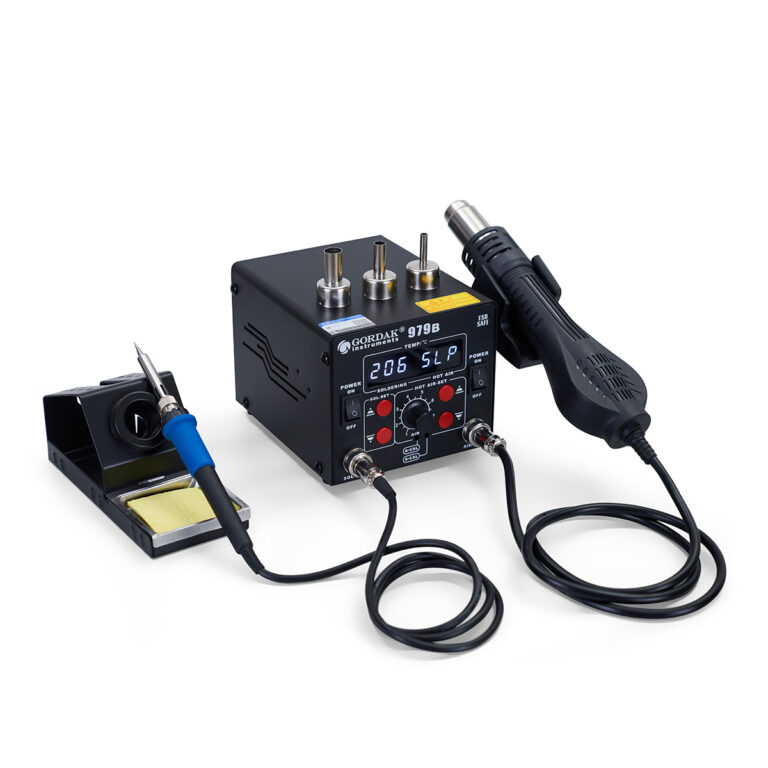
Step 1: Understand Your Equipment
Before getting started, familiarize yourself with the key parts of your two-in-one station:
- Soldering Iron: For through-hole and surface-mount soldering.
- Hot Air Gun: For desoldering, reflow, and SMD/BGA component work.
- Control Panel: Allows adjustment of temperature, airflow, and activation mode.
Gordak two-in-one stations are designed with intuitive controls and stable temperature settings, making them ideal for both beginners and professionals.
Step 2: Safety First
Always follow these safety precautions:
- Wear heat-resistant gloves and safety glasses.
- Work in a well-ventilated area or use a fume extractor.
- Never leave the station unattended while powered on.
- Allow the tools to cool down before storage.
Step 3: Setup and Calibration
- Plug in and power on the unit.
- Choose the appropriate soldering tip and hot air nozzle based on your project.
- Set the soldering iron temperature between 300°C to 350°C (adjust as needed).
- Set the hot air gun temperature to around 280°C to 350°C, with medium airflow for most SMD components.
- Wait for the station to reach operating temperature.
Step 4: Soldering Technique
- Place the tip on the component lead and pad.
- Clean the tip and apply a small amount of solder (tinning).
- Feed solder wire into the joint until it forms a smooth, shiny connection.
- Remove the tip and let the joint cool naturally.
Tip: Use flux to improve wetting and joint quality, especially for fine-pitch SMDs.
Step 5: Rework and Desoldering with Hot Air
- Apply flux around the component.
- Hold the hot air nozzle a few millimeters above the board.
- Move the nozzle in small circles to evenly heat the area.
- Use tweezers to gently lift the component once the solder melts.
- Clean the pads with solder wick or a desoldering pump.
Step 6: Reflow SMD Components
- Align the new SMD component with solder-pasted pads.
- Use the hot air gun to heat the component evenly.
- Observe the solder melt and self-align the part.
- Allow the board to cool.
Step 7: Post-Soldering Cleanup
- Clean the board with isopropyl alcohol and a soft brush to remove flux residues.
- Inspect all solder joints for bridges or cold joints.
- Store tools in the designated holders to avoid damage.
Why Choose Gordak?
Gordak’s two-in-one soldering and rework stations offer:
- Precise temperature control
- Durable, ergonomic design
- Reliable performance for all levels
- Factory pricing for dealers—much cheaper than competitors
Whether you’re an electronics repair shop or a hobbyist, Gordak delivers professional-grade tools at unbeatable value.
Conclusion
Mastering a two-in-one soldering and rework station takes practice, but with the right techniques and quality equipment, you’ll be working like a pro in no time. For reliable performance and factory-direct prices, trust Gordak as your go-to supplier.
Contact us today at info@gordakelec.com to get started with your order.
Two-in-One Rework & Soldering Stations
Two-in-One Soldering and Rework Station: What Is It and Why You Need One
Why Professionals Prefer 2-in-1 Soldering Stations for PCB Repair
Comparing Single vs. Two-in-One Stations: Which Is More Cost-Effective?
Top Benefits of Using a Two-in-One Soldering and Rework Station
How to Use a Two-in-One Soldering and Rework Station Like a Pro
Maintenance Tips for Your Two-in-One Soldering and Rework Station
Top 5 Features to Consider in a Professional 2-in-1 Rework Station
Why Gordak’s Two-in-One Station Is a Smart Investment for Repair Shops