Solid-state drives (SSDs) are essential storage devices in modern electronics. Repairing or modifying SSDs often involves working with tiny surface-mount components (SMDs) on densely packed PCBs. Proper soldering technique is critical to avoid damaging the board or components. This step-by-step guide walks you through the essentials of soldering SSD components safely and effectively.
Essential Tools and Supplies
Before starting, gather the following tools:
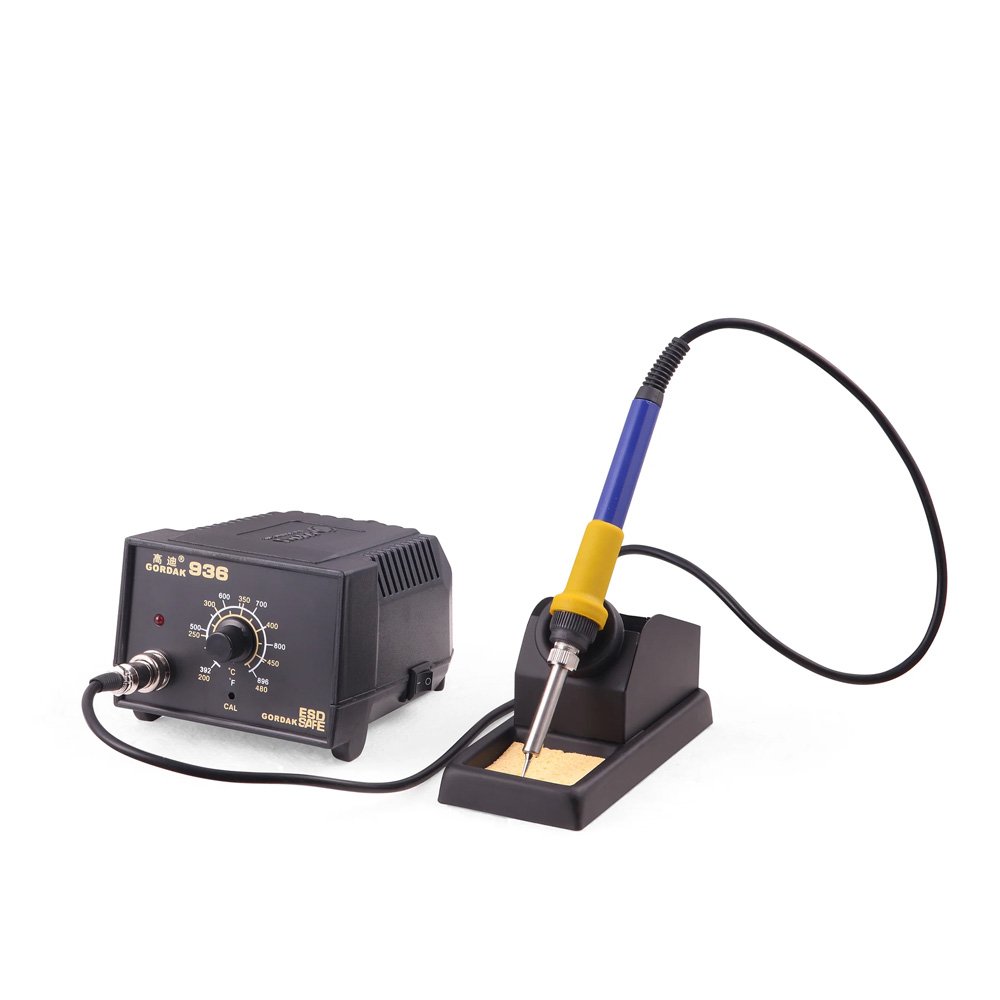
- Soldering Station – Adjustable temperature control is essential for precision soldering.
- Fine Soldering Tips – Ideal for working with small SSD components.
- Solder Wire – Thin, flux-core solder for fine-pitch connections.
- Flux Pen or Paste – Ensures smooth solder flow and prevents oxidation.
- Tweezers – For precise component placement.
- Hot Air Rework Station – For SMD ICs and chips.
- Magnifying Tools – Magnifying lamp or microscope to see fine details.
- ESD Protection – Wrist strap or mat to prevent static damage.
Step 1: Prepare the Workspace
- Work in a clean, well-lit area with minimal distractions.
- Use an ESD-safe mat and wrist strap to prevent electrostatic damage.
- Gather all components, soldering tools, and SSD boards before starting.
Step 2: Preheat the Soldering Station
- Set your soldering station to 320–350°C for leaded solder or 350–370°C for lead-free solder.
- Allow it to stabilize at the target temperature.
Step 3: Apply Flux
- Apply a small amount of flux to the pads where components will be soldered.
- Flux improves solder flow and ensures strong, clean connections.
Step 4: Position the Components
- Use fine-point tweezers to carefully place the SSD components on the PCB pads.
- Ensure they are correctly aligned before applying heat.
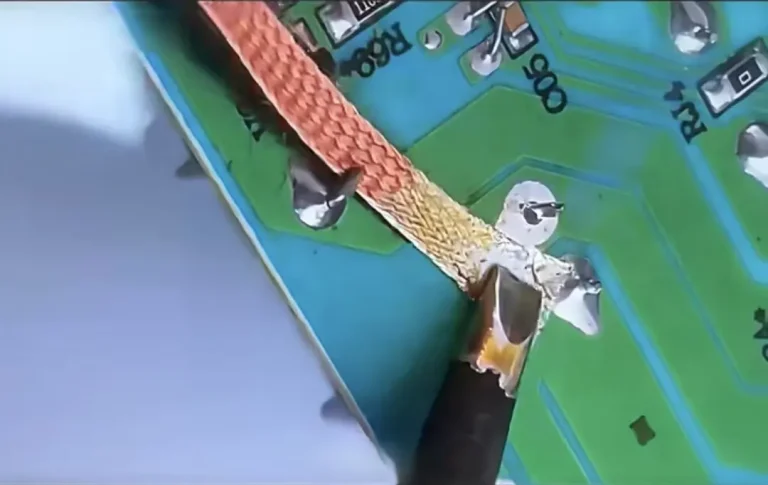
Step 5: Solder the Components
For Hand Soldering:
- Heat the pad and component lead simultaneously.
- Feed a small amount of solder to the joint.
- Remove the solder wire first, then the iron, to prevent lumps or bridges.
For Hot Air Reflow:
- Preheat the area with low airflow and temperature.
- Gradually increase heat until solder melts and flows evenly.
- Carefully remove the iron or hot air once the joint is complete.
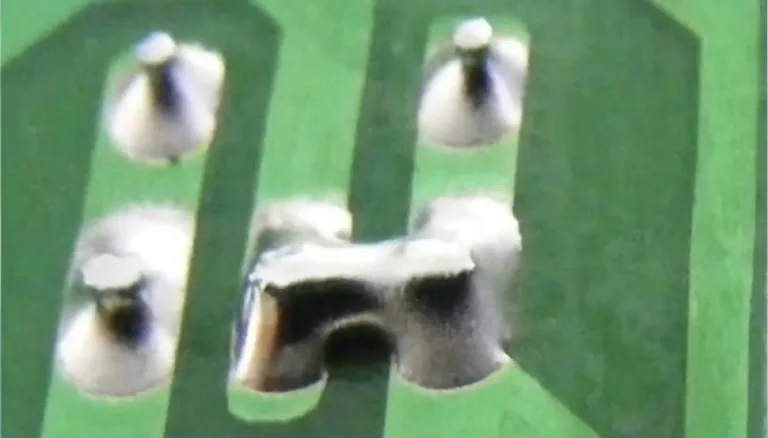
Step 6: Inspect and Clean
- Examine all solder joints under a magnifying tool.
- Look for shiny, smooth, and properly wetted joints.
- Remove any flux residue using isopropyl alcohol.
Step 7: Test the SSD
- After soldering, carefully reconnect the SSD to a test system.
- Verify that all components are functioning correctly and that the drive is recognized.
Tips for Successful SSD Soldering
Work slowly and methodically; rushing can damage sensitive chips.
Keep soldering tips clean and tinned for efficient heat transfer.
Avoid excessive heat to prevent lifting PCB pads or damaging components.
Practice on scrap boards before attempting critical SSD repairs.
About GORDAK
Gordak is a leading manufacturer of soldering and rework equipment, providing high-quality, reliable, and innovative tools for electronics professionals worldwide. With over 30 years of industry experience, Gordak combines advanced technology, precise temperature control, and ESD-safe designs to meet the needs of SMD and through-hole soldering applications. Committed to excellence, Gordak offers affordable solutions, responsive customer support, and products trusted by clients across the globe.