Tinning a soldering iron is the process of coating the tip with a thin layer of solder to protect it and improve performance.
Without proper tinning, the tip quickly oxidizes, leading to poor heat transfer and solder that won’t stick.
This is one of the most common causes of soldering failure in both beginner and professional work.
In this guide, you will learn exactly how to tin a soldering iron properly, how to avoid oxidation, and how to maintain the tip for long-term use.
What Does It Mean to Tin a Soldering Iron?
Tinning a soldering iron refers to the process of applying and maintaining a thin layer of molten solder on the working surface of the tip.
This layer is not just for appearance. It serves as a functional protective barrier.
Core functions of tinning:
- Forms a protective coating against oxidation
- Improves thermal conductivity between tip and solder joint
- Ensures smooth wetting of solder
- Reduces heat loss during operation
Technical background
A soldering tip is typically structured as:
- Copper core (high thermal conductivity)
- Iron plating (protective layer)
Copper transfers heat efficiently but oxidizes quickly. The iron plating protects it, but once exposed to high temperatures and oxygen, oxidation begins forming on the surface.
This oxidation layer prevents solder from bonding properly.
Properly tinned vs oxidized tip
Properly tinned tip:
- Shiny surface
- Smooth solder coating
- Instant solder wetting
- Stable heat transfer
Oxidized tip:
- Black or dull surface
- Solder beads up
- Poor heat transfer
- Requires higher temperature to work
Why Is Tinning a Soldering Iron Important?
Tinning is not optional maintenance. It directly affects performance, precision, and tool lifespan.
Prevents Oxidation
A solder coating acts as a protective barrier between the metal surface and oxygen.
Without this layer, oxidation begins immediately at high temperatures, especially during idle heating.
Improves Heat Transfer
Molten solder fills microscopic gaps between the tip and the work surface, creating a stable thermal bridge.
This results in:
- Faster solder melting
- More consistent heat delivery
- Better control during fine work
Makes Solder Flow More Easily
A properly tinned tip allows solder to wet the surface instantly.
This is critical in:
- PCB repair
- SMD soldering
- Fine-pitch component work
Extends Soldering Tip Lifespan
Tip failure is usually caused by oxidation damage, not mechanical wear.
A maintained solder layer significantly slows down:
- Iron plating degradation
- Copper exposure
- Surface pitting
Reduces Cold Solder Joints
Cold joints occur when heat transfer is unstable.
By maintaining proper tinning:
- Heat transfer improves
- Solder melts evenly
- Joint strength increases
Professional insight
Lead-free solder typically requires higher working temperatures. Higher heat accelerates oxidation, which makes regular tinning even more important in modern electronics manufacturing and repair environments.
Signs Your Soldering Iron Tip Needs Tinning
In real workshop environments, tip failure is often mistaken for equipment failure. In most cases, the issue is simply poor tinning or oxidation buildup.
If your soldering iron is not performing well, check for the following signs:
- Solder beads up instead of sticking to the tip
- Tip surface turns black or dull
- Heat transfer becomes slow or uneven
- Solder does not flow smoothly onto pads or wires
- You need to increase temperature to compensate
- Tip surface feels rough instead of smooth
Many users search for:
“why solder won’t stick to my soldering iron tip”
In most cases, the root cause is oxidation on the tip surface, not defective solder or a broken soldering station.
Tools and Materials You Need
Before starting proper tinning, prepare the correct materials. Using the wrong tools is one of the main reasons beginners damage soldering tips.
Essential tools:
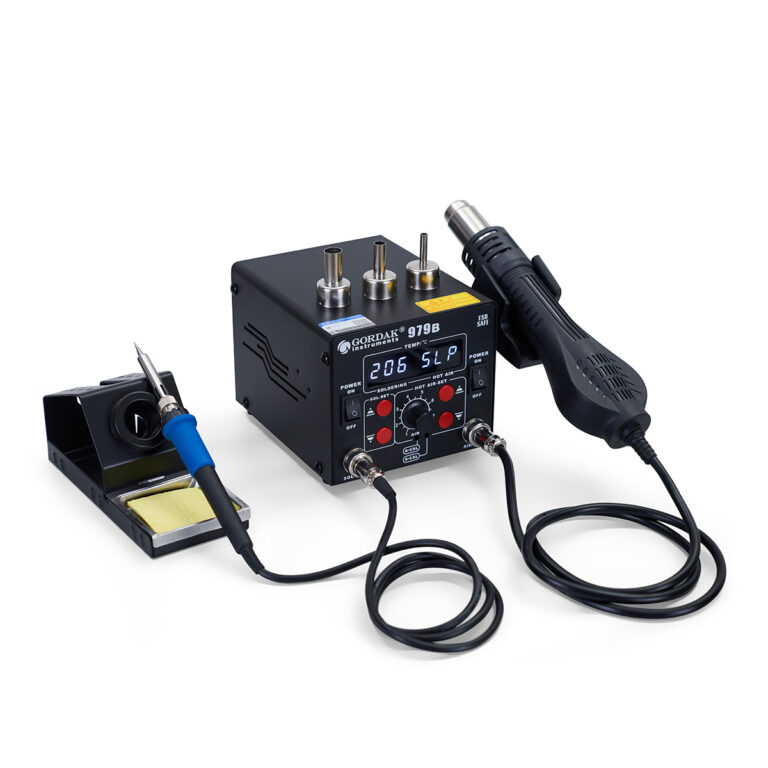
- Soldering iron (temperature controlled recommended)
- Rosin-core solder
- Brass sponge (brass wool)
- Damp sponge (optional)
- Tip tinner (for oxidation recovery)
- Flux (optional, for restoration cases)
Brass Sponge vs Wet Sponge
Both cleaning methods are used in electronics soldering, but they behave very differently in practice.
Brass sponge advantages:
- Minimal temperature drop
- No thermal shock to the tip
- More stable working temperature
- Better for continuous soldering work
Wet sponge advantages:
- Good for removing light residue
- Easy and inexpensive
Professional usage practice:
Experienced technicians often prefer brass wool because repeated cooling and reheating (thermal cycling) can accelerate tip wear over time.
Wet sponge is still useful, but mainly for light cleaning rather than continuous use.
How to Tin a Soldering Iron Step by Step
This is the core maintenance process used in professional electronics repair environments.
Step 1 – Heat the Soldering Iron to the Correct Temperature
Allow the soldering iron to fully stabilize at operating temperature before tinning.
Recommended temperature ranges:
- Leaded solder: 315°C – 350°C
- Lead-free solder: 350°C – 380°C
Higher temperatures are sometimes used in industrial environments, but excessive heat reduces tip lifespan and accelerates oxidation.
A stable temperature-controlled soldering station is strongly recommended for consistent results.
Step 2 – Clean the Tip Properly
Before applying fresh solder, the tip must be cleaned.
Proper cleaning method:
- Lightly wipe on brass sponge or damp sponge
- Remove old solder and flux residue
- Ensure surface is free of loose oxidation
Critical rule (professional standard):
Do NOT use sandpaper, knives, or abrasive files.
These tools damage the iron plating and permanently shorten tip lifespan.
A plated tip is not designed for mechanical scraping.
Step 3 – Apply Rosin-Core Solder to the Tip
Once clean and hot, immediately apply solder to the tip surface.
Correct method:
- Touch solder directly to the working surface
- Allow it to melt and spread evenly
- Ensure full coating on active tip area
A properly tinned tip should appear:
- Smooth
- Shiny
- Evenly coated
Avoid leaving dry patches exposed.
Step 4 – Remove Excess Solder Lightly
After coating, gently wipe off excess solder using brass wool.
The goal is not to remove all solder, but to control the amount.
Important principle:
A thin protective layer must remain on the surface.
Completely wiping the tip dry exposes it to rapid oxidation.
Step 5 – Re-Tin Before Storage
This step is often ignored by beginners but widely practiced by experienced technicians.
Before turning off the soldering station:
- Apply a fresh layer of solder
- Leave the tip coated during cooling
This protects the tip from oxidation during the cooling phase, when metal is still exposed to air at high temperature.
Common Soldering Iron Tinning Mistakes
Many soldering tip failures are caused by incorrect habits rather than poor equipment.
Using Sandpaper or Files
Mechanical abrasion removes the iron plating layer.
Once the plating is damaged:
- Oxidation accelerates rapidly
- Heat transfer becomes unstable
- Tip lifespan drops significantly
Running the Iron Too Hot
Higher temperature does not improve soldering quality.
Instead it causes:
- Faster oxidation
- Burned flux
- Reduced tip lifespan
Use only the temperature required for the job.
Leaving the Tip Dry After Use
A dry tip oxidizes extremely fast during cooling.
This is one of the most common beginner mistakes.
Using Acid Flux or Plumbing Flux
Electronics soldering requires rosin-based flux.
Acid flux can:
- Corrode PCB traces
- Damage components
- Shorten tip lifespan
Over-Cleaning the Tip
Excessive wiping removes the protective solder layer repeatedly.
This exposes the tip surface and increases oxidation risk.
How to Restore an Oxidized Soldering Iron Tip
Even heavily oxidized tips can sometimes be recovered if the damage is not permanent.
Use Tip Tinner
Tip tinner is a restoration compound containing solder and flux.
Method:
- Heat the iron
- Dip tip into tinner
- Allow coating to reform
- Reapply fresh solder
Apply Flux and Fresh Solder
For moderate oxidation:
- Apply flux
- Add fresh solder
- Allow re-wetting of the surface
Use Brass Wool Carefully
Brass wool can remove surface oxidation gently.
Avoid aggressive scrubbing to protect plating integrity.
When to Replace the Tip
Replacement is required when:
- Copper core becomes exposed
- Surface is heavily pitted
- Solder no longer wets at all
- Heat transfer becomes unstable
At this stage, restoration is no longer effective.
How Often Should You Tin a Soldering Iron?
Tinning is not a one-time action. It is a continuous maintenance habit.
Recommended practice:
- Before starting work
- During long soldering sessions
- After cleaning the tip
- Before shutting down the station
Snippet summary:
Tinning should be done regularly during use, especially before and after soldering sessions, and whenever solder flow becomes inconsistent.
Lead-Free Solder and Tip Oxidation
Modern electronics manufacturing widely uses lead-free solder due to environmental regulations such as RoHS compliance.
However, lead-free solder introduces maintenance challenges.
Key characteristics:
- Higher melting temperature requirement
- Increased thermal stress on tip
- Faster oxidation rate
Professional insight:
In practical repair environments, technicians often observe that lead-free soldering requires more frequent cleaning and re-tinning compared to traditional leaded solder.
This is not a tool defect, but a direct result of higher operating temperatures.
Professional Tips to Make Soldering Tips Last Longer
Experienced technicians follow consistent habits to extend tool lifespan.
Best practices:
- Use the lowest effective temperature
- Maintain a constant thin solder coating
- Avoid leaving the iron idle at high heat
- Use sleep or standby mode when possible
- Use high-quality rosin-core solder
- Avoid excessive pressure during soldering
- Store tip with solder coating intact
Industry note:
In professional environments, temperature-controlled soldering stations are preferred because they reduce unnecessary thermal stress and improve long-term tip durability.
Frequently Asked Questions
Do new soldering iron tips need tinning?
Yes. New tips should always be tinned before first use to protect the plating and ensure proper wetting.
Why does solder ball up on my tip?
This is usually caused by oxidation or contamination on the tip surface, preventing solder from wetting properly.
Can you over-tin a soldering iron?
Yes, excessive solder can reduce precision, but it is not harmful to the tip. A thin even layer is ideal.
Should I tin the tip before turning the iron off?
Yes. Leaving a solder layer protects the tip from oxidation during cooling.
Is brass wool better than a wet sponge?
For most electronics work, brass wool is preferred because it reduces thermal shock and maintains stable temperature.
Why does my soldering iron tip turn black so quickly?
Common causes include high temperature, poor maintenance habits, lead-free solder use, and leaving the tip dry.
How long does a soldering iron tip last?
Tip lifespan depends on usage and maintenance. With proper care, a quality tip can last from several months to years in normal electronics work.
Conclusion
Tinning a soldering iron is not just a beginner technique. It is a core maintenance habit that directly affects soldering quality, tool lifespan, and overall efficiency.
A properly tinned tip:
- Transfers heat more efficiently
- Produces cleaner solder joints
- Resists oxidation
- Improves solder flow stability
- Lasts significantly longer
Most soldering issues are not caused by equipment failure, but by improper tip maintenance.
By following correct tinning practices and avoiding common mistakes, both beginners and professionals can achieve more stable and reliable soldering results.
Looking for reliable soldering and rework equipment built for professional performance? Explore GORDAK’s info@gordakelec.com soldering stations and upgrade your electronics work with stable, precise, and long-lasting tools.