您是否曾想过什么是 SMD 焊接,以及这对您的焊接需求有何帮助?如果有,那就有很多东西需要学习。幸运的是,这正是我们的专家可以提供帮助的地方,我们今天概述了您需要了解的有关 SMD 焊接的一些主要内容,以帮助您做出决定。
什么是 SMD 焊接?
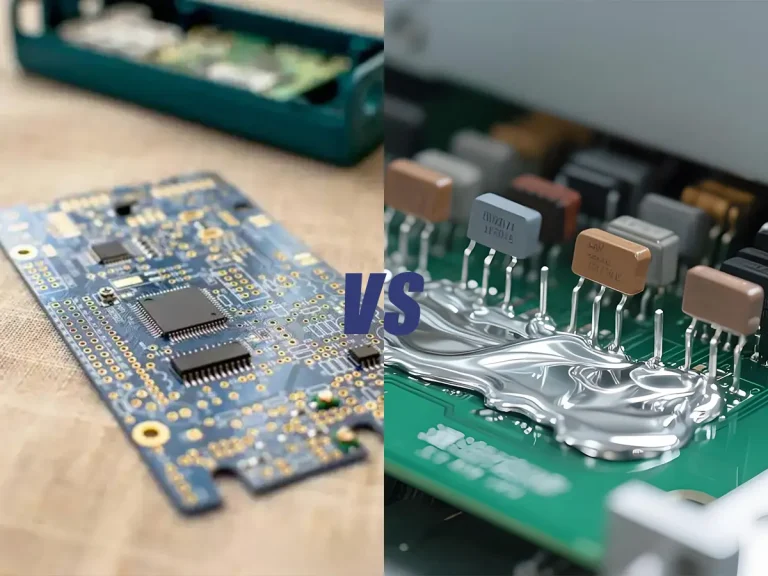
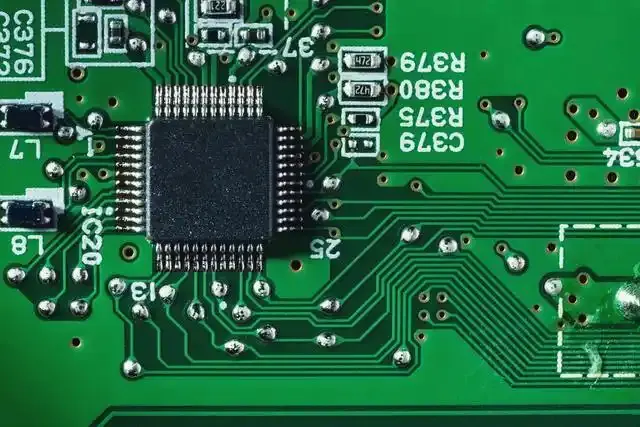
在进一步讨论之前,我们首先需要定义什么是 SMD 焊接。SMD 焊接是表面贴装器件焊接的缩写。这种特殊方法是指将表面贴装元件焊接到印刷电路板上。
与普通的通孔安装方法相比,SMD 焊接意味着元件直接安装在表面上。这就提供了一种独特的方法,对于小型焊接应用而言,这种方法具有多功能性和价值。反过来,与传统的焊接工艺相比,这种方法也更为精确。
Essential Tools and Materials for SMD Soldering
Successful SMD soldering depends on more than a soldering iron. Because surface-mount components are small and closely spaced, the right combination of heating, positioning, inspection, and cleaning tools can make the process much easier.
For most manual SMD soldering projects, the following tools are useful:
Temperature-controlled soldering station: Provides stable and adjustable heat for soldering individual pads and component leads.
Fine soldering tips: Small conical or chisel tips provide better access to fine-pitch SMD components.
Fine solder wire: A small-diameter solder wire gives you better control when working with small pads.
通量: Flux improves solder flow and helps prevent oxidation during soldering.
ESD-safe tweezers: Fine-point tweezers make it easier to position and hold small SMD components.
Magnification: A magnifying lamp or microscope helps you inspect small solder joints and identify solder bridges or insufficient solder.
热风返工站: Useful for reflowing solder paste and removing or replacing multi-pin SMD components.
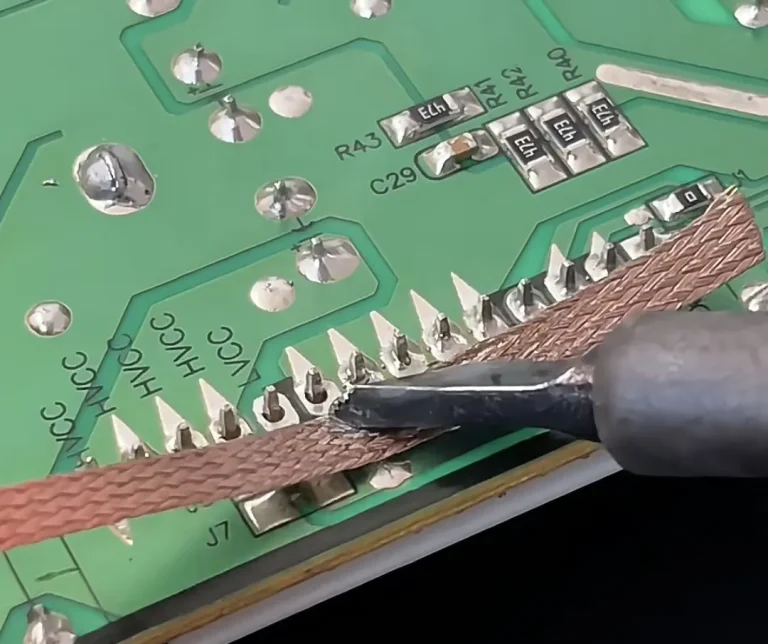
Solder wick: Helps remove excess solder and correct solder bridges after soldering.
Isopropyl alcohol and lint-free wipes: Useful for cleaning flux residues after the soldering process.
For beginners, a temperature-controlled soldering station, fine tips, flux, tweezers, solder wire, and basic magnification are usually enough to start. More advanced work may require a hot air rework station, solder paste, stencils, or additional inspection equipment.

如何开始 SMD 焊接
开始接触 SMD 焊接听起来可能很棘手,但幸运的是,情况并非如此。事实上,只要知道自己在做什么以及如何完成这项任务,SMD 焊接就会变得相对简单。
首先,您当然需要订购元件;为确保最佳效果,强烈建议使用优质电路板。此外,您还需要投资购买顶级烙铁或热风焊枪,以获得 SMD 焊接的最佳效果。
在进一步操作之前,您需要彻底清洁印刷电路板,以确保其完全清洁和干燥;在这方面,少量异丙醇通常会起到很好的作用。一旦确信印刷电路板已被彻底清洁,就可以开始涂抹焊膏了。当然,如何涂抹锡膏通常取决于印刷电路板的复杂程度,因此如果要在更复杂的印刷电路板上涂抹锡膏,可能需要使用钢网。幸运的是,如果这证明很棘手,你可以简单地把它清理掉,然后再试一次。
焊膏准确到位后,就可以开始放置元件了,这通常是 SMD 焊接中比较复杂的一个环节。然后,只需使用热风焊枪(或回流焊炉,如果有的话)回流焊即可。
最后,剩下要做的就是清理印刷电路板,清除任何焊锡残渣。在这之后,您就可以清理印刷电路板并使其干燥了。
How to Solder SMD Components Step by Step
Once your PCB, components, and tools are ready, you can begin soldering SMD components. The exact technique depends on the component package and whether you are using a soldering iron or hot air rework station, but the basic workflow remains similar.
Step 1: Prepare and Clean the PCB
Clean the PCB pads with isopropyl alcohol and allow the surface to dry completely.
Inspect the pads before placing the component. Oxidation, dirt, or excessive solder residue can prevent the solder from flowing correctly.
For small SMD components, make sure the PCB is firmly secured so it does not move during soldering.
Step 2: Apply Flux
Apply a small amount of flux to the pads.
Flux helps solder flow across the pad and component termination while reducing oxidation during heating. For fine-pitch components, controlled flux application can also help reduce solder bridging.
Avoid applying excessive flux, especially when working around closely spaced components.
Step 3: Position the SMD Component
Use ESD-safe tweezers to position the component accurately on its pads.
For components with multiple leads, check the orientation and alignment before soldering. A small misalignment can cause several pins to connect incorrectly.
For a simple two-terminal component, such as an SMD resistor or capacitor, make sure both ends are centered over the corresponding pads.
Step 4: Tack-Solder One Side
For manual soldering with an iron, heat one pad and apply a small amount of solder.
While the solder is molten, position the component with tweezers and allow the solder to secure one side.
Remove the heat and let the solder solidify.
This temporary connection keeps the component in position while you solder the remaining terminals.
Step 5: Solder the Remaining Pads
Apply a controlled amount of solder to the remaining pads.
Keep the soldering tip in contact with the joint only long enough to create a proper connection. Avoid adding excessive solder, especially on fine-pitch components.
For ICs with multiple pins, drag soldering can be used with an appropriate tip and sufficient flux.
Step 6: Inspect the Solder Joints
After soldering, inspect the component under magnification.
Look for:
- Solder bridges between adjacent pads
- 焊料不足
- Uneven solder coverage
- Misaligned components
- Cold or poorly formed joints
If a defect is found, apply flux and rework the affected area rather than adding more solder blindly.
Step 7: Clean and Test the PCB
Remove remaining flux residue when appropriate using isopropyl alcohol and a suitable lint-free wipe or brush.
After the board is clean and dry, check for shorts or unwanted connections before powering the circuit.
This basic workflow is suitable for many common SMD components and can be adapted according to the component package and soldering method.
How to Solder Different Types of SMD Components
The basic SMD soldering process is similar across many components, but the technique changes according to the package size and number of terminals.
SMD Resistors and Capacitors
Small two-terminal components such as resistors and capacitors are among the easiest SMD components to solder manually.
Apply a small amount of solder to one pad first. Position the component with tweezers, heat the pre-tinned pad, and allow the component to settle into position.
Then solder the opposite terminal and check both joints under magnification.
SMD Diodes and LEDs
Diodes and LEDs require additional attention to orientation.
Before soldering, identify the polarity marking on both the component and PCB. Position the component correctly, tack one side, and then solder the remaining terminal.
Do not apply unnecessary heat for an extended period, especially when working with heat-sensitive LEDs.
SMD ICs
Multi-pin ICs require more precise alignment than two-terminal components.
For small-pitch packages such as SOIC, QFP, or similar devices, apply flux and carefully align the component with the PCB pads. Tack one or two pins to secure the package before soldering the remaining pins.
Drag soldering with a suitable soldering tip can help create multiple connections efficiently. If solder bridges appear, remove the excess solder with solder wick and additional flux.
QFN and Other Bottom-Terminated Packages
Packages with contacts underneath the component are more challenging because the solder joints are not fully visible after placement.
These applications may require solder paste, controlled reflow, or hot air techniques. Careful paste application and thermal control are particularly important because excessive solder can create problems beneath the package.
Common SMD Soldering Problems and How to Fix Them
Even with the right tools, beginners may encounter several common SMD soldering problems.
Solder Bridges
A solder bridge occurs when excess solder connects two adjacent pads or pins.
Possible causes:
- Too much solder
- Insufficient flux control
- Excess solder on the tip
- Incorrect soldering technique
Apply flux and use solder wick to remove the excess solder. For fine-pitch ICs, drag soldering with controlled solder volume can also help.
Cold Solder Joints
A cold joint may occur when the pad or component terminal does not receive enough heat.
The result can be an incomplete or unreliable electrical connection.
Make sure the soldering tip contacts the joint properly and that enough heat is transferred to both surfaces before applying solder.
Component Movement
Small SMD components can move during soldering, particularly when using hot air.
Excessive airflow is a common cause.
Reduce the airflow and use the smallest practical heating area for the component.
Insufficient Solder
Too little solder can result in an incomplete connection.
If the joint does not adequately cover the pad and component termination, apply a controlled amount of additional solder and inspect the result under magnification.
Excessive Heat
Too much heat can damage components or PCB pads.
Avoid compensating for poor heat transfer by simply increasing the temperature. Instead, check the solder type, flux, tip condition, airflow, and contact technique.
Soldering Iron vs. Hot Air for SMD Soldering
Both a soldering iron and a hot air rework station can be used for SMD work, but they are suited to different tasks.
| Tool | 最适合 |
|---|---|
| Soldering iron | Individual pads, small components, manual SMD assembly |
| 热风返修站 | Multi-pin ICs, component removal, localized reflow |
| Solder paste + hot air | Reflowing multiple SMD connections |
| Soldering iron + flux | Precision corrections and individual joints |
A 电烙铁 is often the simplest option for beginners working with individual SMD components. It provides direct control over a specific solder joint and does not require solder paste or a hot air system.
A 热风返修站 becomes more useful when several solder joints need to be heated simultaneously. It is particularly useful for removing or replacing multi-pin ICs and for localized reflow work.
For more complex PCB repair, technicians often use both tools. A soldering iron can handle individual joints and corrections, while hot air can be used for component removal and broader reflow.
The best choice therefore depends on the component package, PCB layout, and type of work rather than simply choosing the most powerful tool.
最终想法
如果您一直在寻找一种新的焊接方法,SMD 焊接可能就是一个很好的解决方案。事实上,SMD 焊接是一种既实用又简单的焊接解决方案,对于那些需要一种新方法来加工自己的电气元件的人来说,这可能是一个极好的选择。
因此,如果您对什么是 SMD 焊接或如何开始 SMD 焊接有任何进一步的问题或疑问,请随时与我们友好的专家联系,联系方式是 info@gordakelec.com.我们将帮助您找到满足您需求的理想焊接方法!
Soldering Basics & Tutorials
An Introduction to SMD Soldering Techniques
DIY PCB Soldering: Tools, Tips, and Techniques