Have you ever wondered about how to use a soldering iron? Soldering irons can be exceptionally useful tools, but knowing how they work is vital to get the most from them and avoid potentially getting injured while using a soldering iron. Luckily, our experts have outlined some of the key things you need to know about using a soldering iron as follows to help you learn more about these crucial pieces of equipment.
What Is a Soldering Iron?
A soldering iron is a handheld heating tool used to melt solder and create a reliable connection between electronic components, wires, and conductive surfaces. A typical soldering iron consists of a heating element, handle, power or temperature control, and a replaceable soldering tip.
During soldering, the tip transfers heat to the surfaces being joined. Once the joint reaches the appropriate temperature, solder melts and flows across the heated surfaces. After the solder cools and solidifies, it forms a mechanical and electrical connection.
For beginners, understanding this basic process is important because a good solder joint depends on more than simply melting solder. The soldering iron must transfer enough heat to the joint without overheating the components or damaging the circuit board.
How Does a Soldering Iron Work?
A soldering iron works by converting electrical power into heat and transferring that heat through the soldering tip to the joint. The heating element raises the tip to the selected temperature, while the tip transfers heat to the component lead, wire, PCB pad, or other surface being soldered.
The basic process is:
Electrical power → Heating element → Soldering tip → Joint → Solder
When the joint reaches the appropriate temperature, solder melts and flows around the heated surfaces. The solder should be applied to the joint rather than melted on the tip and carried to the workpiece. This allows the solder to flow where it is needed and helps create a stronger, more reliable connection.
Temperature control is also important. A temperature that is too low may prevent proper solder flow, while excessive heat can damage components, lift PCB pads, or shorten soldering tip life.
What Do You Need to Use a Soldering Iron?
Before you start soldering, prepare the right tools and materials. Having everything within reach makes the process safer and helps you work more efficiently.
| Tool or Material | Purpose |
|---|---|
| Soldering iron or soldering station | Provides controlled heat for soldering |
| Soldering tip | Transfers heat to the joint |
| Solder wire | Creates the electrical and mechanical connection |
| Flux | Helps remove surface oxides and improves solder wetting |
| Soldering stand | Provides a safe place to rest the hot iron |
| Tip cleaner | Removes residue and oxidation from the tip |
| Helping hands or PCB holder | Keeps components and boards stable |
| Side cutters | Trims component leads after soldering |
| Desoldering braid | Removes excess solder when needed |
| Safety glasses | Protects your eyes from solder splashes and debris |
| Fume extraction or good ventilation | Helps control soldering fumes |
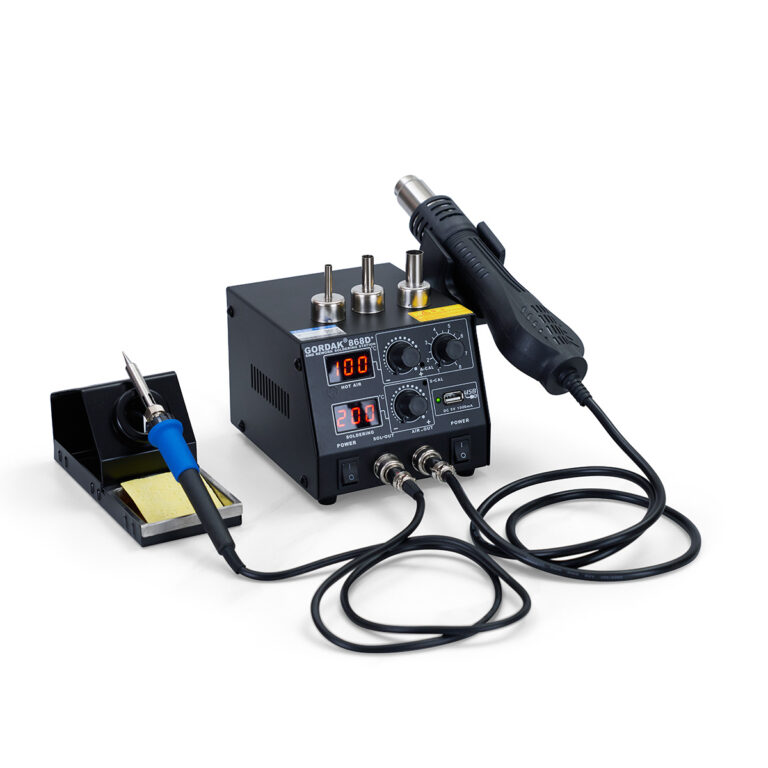
For occasional repairs, a basic soldering iron may be sufficient. For electronics assembly, repair, or frequent soldering work, a temperature-controlled soldering station provides better control over temperature and heat recovery.
Soldering Iron Basics: Choosing the Right Iron
Choosing the right soldering iron can make a significant difference, especially when you are learning how to solder. A suitable soldering iron should provide stable heat, comfortable handling, and enough power for the type of work you plan to do.
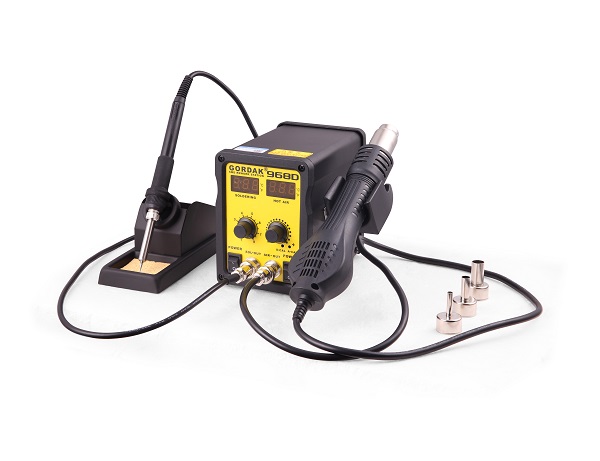
Soldering Iron vs. Soldering Station
A basic soldering iron is a compact tool with a built-in heating element and usually has limited temperature adjustment. It can work well for simple repairs and occasional soldering.
A soldering station separates the iron from the main control unit and normally provides adjustable temperature control, better temperature stability, and improved heat recovery. These features make a soldering station a practical choice for electronics assembly, PCB repair, and frequent soldering.
What Makes a Good Soldering Iron for Beginners?
When choosing a soldering iron for beginners, consider:
- Adjustable temperature: Allows you to match the heat to different solder alloys and applications.
- Stable temperature control: Helps maintain consistent heat during soldering.
- Adequate power: Provides enough thermal performance for joints with different thermal masses.
- Compatible soldering tips: Different tip shapes and sizes make different soldering tasks easier.
- Fast heating and heat recovery: Helps the tool return to the selected temperature after heat is transferred to the joint.
- Comfortable handle: Reduces hand fatigue during longer soldering sessions.
- Easy tip replacement: Makes it easier to maintain the tool and adapt it to different applications.
For beginners who plan to work with electronics regularly, a temperature-controlled soldering station can provide more flexibility and control than a basic fixed-temperature soldering iron.
How to Choose the Right Soldering Iron Tip
The soldering tip is the part of the iron that transfers heat to the joint. Choosing the right tip size and shape can make soldering easier and improve heat transfer.
Conical Tip
A conical tip has a pointed end and is useful for precision work, small components, and areas with limited access. However, its small contact area may transfer less heat than a larger tip.
Chisel Tip
A chisel tip has a flat working surface that provides more contact with the joint. It is a versatile choice for wires, through-hole components, PCB pads, and general electronics work.
Bevel or Hoof Tip
A bevel or hoof tip has an angled working surface that can hold a small amount of molten solder. It can be useful for dragging solder across multiple connections and for certain surface-mount soldering techniques.
How to Choose the Right Tip Size
The tip should be large enough to transfer sufficient heat to the joint but small enough to avoid touching nearby components or pads.
A common beginner mistake is choosing the smallest possible tip for every task. A very small tip may have insufficient thermal mass for larger joints and can make it harder to transfer heat efficiently. Match the tip to the size and thermal requirements of the joint rather than simply choosing the smallest tip available.
Soldering Iron Temperature Guide
The correct soldering iron temperature depends on the solder alloy, component size, PCB design, tip size, and thermal mass of the joint. There is no single temperature that works for every soldering application.
As a general starting point:
| Soldering Application | Typical Starting Range |
|---|---|
| Leaded electronics solder | 300–350°C (572–662°F) |
| Lead-free electronics solder | 350–380°C (662–716°F) |
| Small electronic joints | Lower end of the suitable range |
| Larger wires or high thermal-mass joints | Higher end may be required |
These ranges are general guidelines rather than fixed settings. Always consider the solder manufacturer’s recommendations and the temperature limits of the components and PCB.
The goal is to transfer enough heat to the joint for the solder to flow properly without keeping the component exposed to excessive heat for too long. Using a higher temperature does not necessarily make soldering better or faster.
How to Prepare and Tin a Soldering Iron Tip
Before making a solder joint, the soldering tip should be clean and properly tinned. A clean, tinned tip transfers heat more efficiently and helps solder flow onto the joint.
1. Clean the Tip
Heat the soldering iron to the appropriate working temperature, then remove oxidation and residue from the tip using a suitable tip-cleaning method, such as brass wool or a damp soldering sponge.
Avoid aggressively filing or sanding a modern plated soldering tip because this can damage the protective plating and shorten the tip’s service life.
2. Tin the Tip
Apply a small amount of solder to the cleaned tip so that a thin layer covers the working surface. This process is called tinning.
Tinning helps protect the tip from oxidation and improves heat transfer between the tip and the joint.
3. Keep the Tip Tinned
Do not leave a hot soldering tip completely bare for an extended period. Reapply a small amount of solder when the tip begins to look dry or when solder no longer wets the surface properly.
A properly maintained tip should allow solder to melt and spread smoothly across its working surface.
How to Use a Soldering Iron: A Beginner’s Guide
Using a soldering iron can often seem difficult, but this isn’t necessarily the case. However, using a soldering iron is relatively straightforward once you know how. Luckily, we’ve outlined some of the key things you need to know to ensure you’re ready to get started.
#1 Learn Basic Soldering Safety
Before you begin soldering, it’s vital to first learn the basics of soldering safety. Indeed, soldering irons, by their nature, achieve exceptionally high temperatures, and this can put operatives (and those around them) at risk.
As such, make sure you know the basics of staying safe first, including the core safety equipment you’ll need (such as eyewear, gloves, and the like). Always make sure to use the soldering iron in a well-ventilated and spacious area where there are no trip hazards and the like, too. These are just a few safety tips when soldering; you may need to undertake a soldering safety course if you’re still unsure.
#2 Prepping a Soldering Iron
Once you have ensured all of the key safety requirements for soldering are met, you’ll next need to prep the soldering iron by tinning the tip. In order to do so, ensure the tip of the iron is attached tightly, then allow the iron to heat up. Once the soldering iron has heated up, wipe the tip with a damp sponge (don’t touch the tip directly!) Then, once the tip is clean and hot, simply touch it to the solder, allowing this to coat the tip evenly.
#3 Prepping the Component
Once the soldering iron’s ready, ensure it’s secured somewhere safe, then look at prepping the component. This is achieved by mounting the component, then heating the soldering iron to a temperature of 300 degrees. Then, heat the copper pad and the resistor lead by holding the soldering.
#4 Apply the Solder
At this point, you can look at applying the solder. Touch the solder to the joint (without moving the soldering iron from the copper pad and lead. Then, allow the solder to melt when touched; you’ll need to ensure the joint is suitably hot enough for this, as a cold joint won’t melt the solder well.
#5 Finishing Up
By now, the solder is nearly complete; all you need to do is remove the soldering iron from the solder and leave it to cool down slowly, before removing any surplus wire that may be left from the leads.
How to Solder Wires With a Soldering Iron
Soldering wires is one of the most common applications for a soldering iron. The basic process is simple, but proper preparation helps create a strong and reliable connection.
- Strip the insulation: Remove only enough insulation to expose the required length of conductor.
- Prepare the wires: Align and twist the wire strands so they remain together.
- Tin the wires: Apply a small amount of solder to the exposed conductors.
- Position the wires: Place the wires together and keep them stable.
- Heat the connection: Touch the soldering tip to both wires to transfer heat evenly.
- Apply solder: Feed solder into the heated connection until it flows around the conductors.
- Remove heat: Stop feeding solder and remove the iron.
- Inspect the joint: Allow the connection to cool before checking its mechanical strength and solder coverage.
- Insulate the connection: Use suitable heat-shrink tubing or another appropriate insulation method where required.
Avoid applying excessive solder. The goal is to create a secure connection with good solder coverage while keeping the wire strands properly joined.
How to Solder Components to a PCB
Through-hole components are a common starting point for beginners because the component leads pass through holes in the PCB and are relatively easy to position.
To solder a through-hole component:
- Insert the component leads through the correct PCB holes.
- Bend the leads slightly if necessary to keep the component in position.
- Place the soldering tip so it contacts both the component lead and the copper pad.
- Allow the joint to heat sufficiently.
- Feed a small amount of solder into the heated joint.
- Remove the solder and then remove the soldering iron.
- Allow the joint to cool without moving the component.
- Trim the excess component lead with side cutters if required.
- Inspect the joint for proper solder coverage and possible solder bridges.
For small surface-mount components, soldering requires greater precision and may require a smaller tip, appropriate flux, and more controlled heat application.
What Does a Good Solder Joint Look Like?
Knowing how to recognize a good solder joint is just as important as knowing how to make one.
Signs of a Good Solder Joint
A good solder joint should:
- Fully connect the intended surfaces
- Show good solder wetting
- Have sufficient but not excessive solder
- Remain mechanically stable after cooling
- Avoid contact with neighboring pads or components
- Show no obvious cracks or gaps
Common Signs of a Poor Solder Joint
A poor joint may have:
- A dull, rough, or grainy appearance
- Incomplete solder coverage
- A visible gap between the solder and the surface
- Excessive solder
- A solder bridge between adjacent pads
- Cracks or movement after cooling
If the solder has not properly flowed onto both surfaces, do not simply add more solder. Reheat the joint, allow the existing solder to flow properly, and add a small amount of fresh solder if necessary.
Common Soldering Problems and How to Fix Them
Beginners often encounter the same soldering problems. Understanding the cause can help you correct the joint without damaging the component or PCB.
| Problem | Possible Cause | How to Fix It |
|---|---|---|
| Solder will not melt properly | Temperature is too low or the tip cannot transfer enough heat | Check the temperature, tip condition, and tip size |
| Solder will not stick to the tip | Oxidized or poorly tinned tip | Clean and re-tin the tip |
| Solder will not flow onto the joint | The joint is not hot enough | Heat both surfaces before applying solder |
| Solder forms a ball | Poor wetting or contaminated surfaces | Clean the surfaces and use appropriate flux |
| Joint looks dull or grainy | Insufficient heating or poor wetting | Reheat the joint and allow solder to flow properly |
| Too much solder | Excessive solder feed | Use a smaller amount of solder |
| Solder bridge forms | Too much solder or an unsuitable tip | Remove excess solder and use a suitable tip |
| Tip turns black | Oxidation or excessive heat | Clean and re-tin the tip, then review the temperature |
| PCB pad lifts | Excessive heat or prolonged heating | Reduce heat exposure and use proper soldering technique |
| Tip wears out quickly | Poor maintenance or prolonged high-temperature exposure | Keep the tip clean and tinned and avoid unnecessary heat |
Do not keep increasing the temperature when a joint does not solder correctly. First check whether the tip is clean, properly tinned, large enough for the joint, and making good contact with both surfaces.
How to Clean and Maintain a Soldering Iron
Proper soldering iron maintenance helps maintain heat transfer and extends soldering tip life.
Clean the Tip Regularly
Remove excess solder and residue during normal soldering. Brass wool and a suitable damp soldering sponge are commonly used for tip cleaning. Follow the soldering station manufacturer’s recommendations for the appropriate cleaning method.
Keep the Tip Tinned
A thin layer of solder on the working surface helps protect the tip from oxidation and supports efficient heat transfer. Re-tin the tip whenever it becomes dry or solder no longer wets the surface properly.
Avoid Excessive Heat
Keeping a soldering iron at unnecessarily high temperatures can accelerate oxidation and reduce tip life. Use the lowest practical temperature that allows the solder to flow properly for your application.
Do Not Aggressively Sand the Tip
Modern soldering tips typically use protective plating on the working surface. Filing or aggressively sanding the tip can damage this plating and shorten its service life.
Replace Damaged Tips
Replace a soldering tip when the working surface becomes severely worn, pitted, damaged, or no longer accepts solder properly after appropriate cleaning and tinning.
Soldering Safety for Beginners
A soldering iron can reach several hundred degrees Celsius, so always treat the tool and recently soldered components as hot.
Follow these basic safety practices:
- Place the soldering iron in a stable stand whenever you are not actively using it.
- Keep the work area clear of paper, solvents, plastics, and other flammable materials.
- Wear appropriate eye protection.
- Work in a well-ventilated area and use suitable fume extraction when needed.
- Never touch the soldering tip with your hands.
- Do not leave a powered soldering iron unattended.
- Do not solder energized electronic circuits unless the equipment and procedure are specifically designed for live work.
- Allow the joint, component, and soldering tip to cool before handling them.
- Wash your hands after handling lead-containing solder.
- Keep soldering tools away from children and anyone who has not been trained to use them.
Safety requirements may vary depending on the solder, flux, equipment, and application. Always follow the manufacturer’s instructions and applicable workplace safety requirements.
Final Thoughts
Although soldering irons are incredibly useful tools, it’s well worth keeping in mind that they can also be somewhat dangerous. Furthermore, getting the best results from your soldering iron use may be difficult without having an efficient process and a thorough understanding of how these tools work. If you have further questions, please contact us at info@gordakelec.com.
Soldering Basics & Tutorials
A Step-by-Step Guide to the Soldering Process
An Introduction to SMD Soldering Techniques
A Beginner’s Guide to SMD Soldering
DIY PCB Soldering: Tools, Tips, and Techniques
How to Use a Soldering Iron – A Beginner’s Guide
Essential Tools and Supplies for Soldering Beginners
Essential Electronics Soldering Tips and Tricks for Beginners
Essential Tools for Soldering Circuit Boards
The Importance of Soldering in Electronics